One thing I hadn't initially been thinking about is the big space that was going to be made when I joined the two Butterwick Houses together. I decided rather than do more bedrooms or other living spaces that I should make them storage spaces, and I had a lot of fun with doing them, going so far as to go all the way back through my stash of items and find some items that I didn't think I was going to use anywhere else, to get rid of them, so to speak. It also let me use the giant hutch from Seaside Miniatures that I didn't think would fit anywhere.

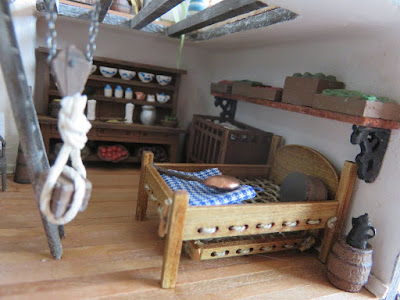
I don't think I can log up every single piece of furniture but here are some of the big ones: the butcher shop items (which I displayed as a sort of "larder" on the bottom floor) were from Just Quarters; the butter churn you see above and the open barrels were from Stewart Dollhouse; other barrels and metal parts were from S&D Models, but the chain, hook, and some other metal items were from Narrow Gauge Modeling; the crib, table, and two wooden trunks are from Petworth Miniatures; and the bed and trundle bed are from Herdwick Landscapes. I was glad to have a place where the incredible construction of them (they shipped fully assembled!) could be shown better.
If you're curious about a particular item, let me know in the comments and I'll see if I can track it down!


Honestly, I went with the open floor because I was running out of floorboards! But I'm very chuffed with how it turned out.


Comments
Post a Comment