
I FINALLY completed the join

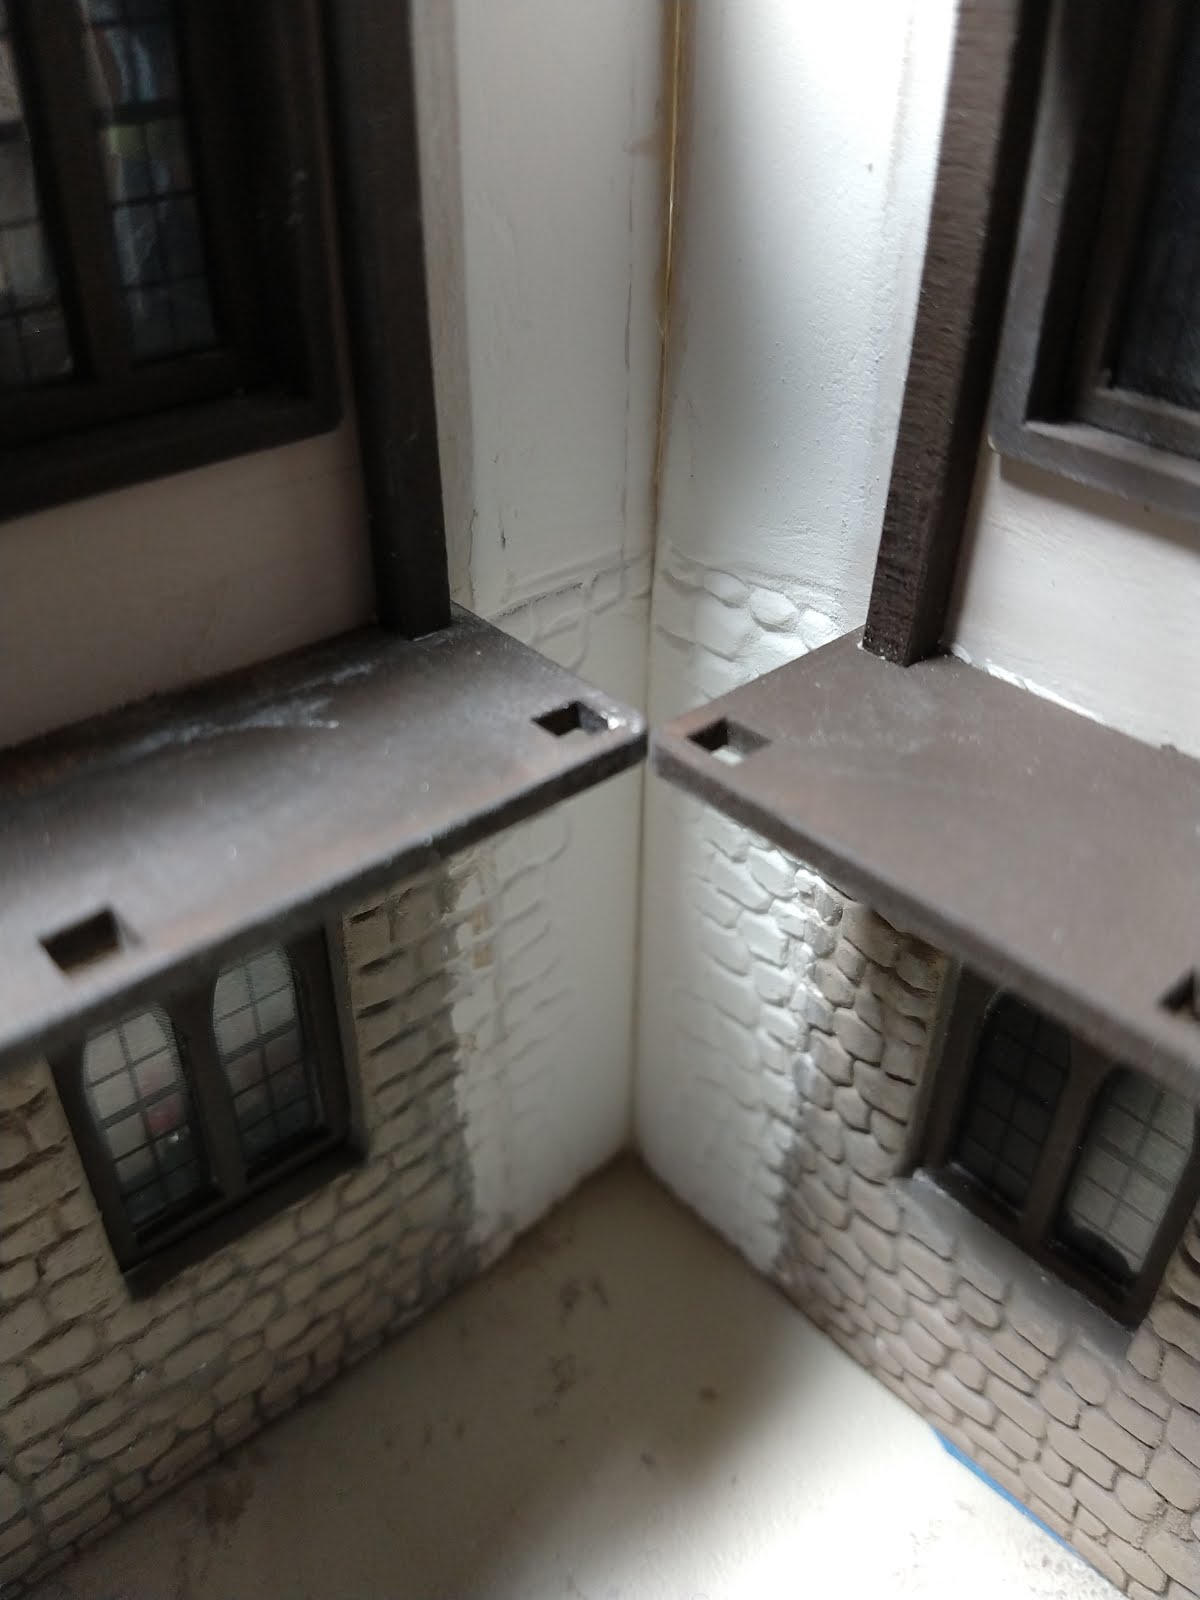
So if it seems like I've abandoned this project, I haven't...I've just been working and working without completing much of anything. That's because I've been on the joining of the two Butterwick houses to create the gallery for months now. But now it's done!


This was a complex process, albeit mostly executed by me flying by the seat of my pants. It was all done with pieces of wood cut to mostly fit and then glued into place, with liberal amounts of Crackshot to even things out and fill in the gaps, and also some landscaping mesh to fill in on the back part of the roof. Rather than try to explain it all, though, I'll just share my photos, which I think do a better job of this!


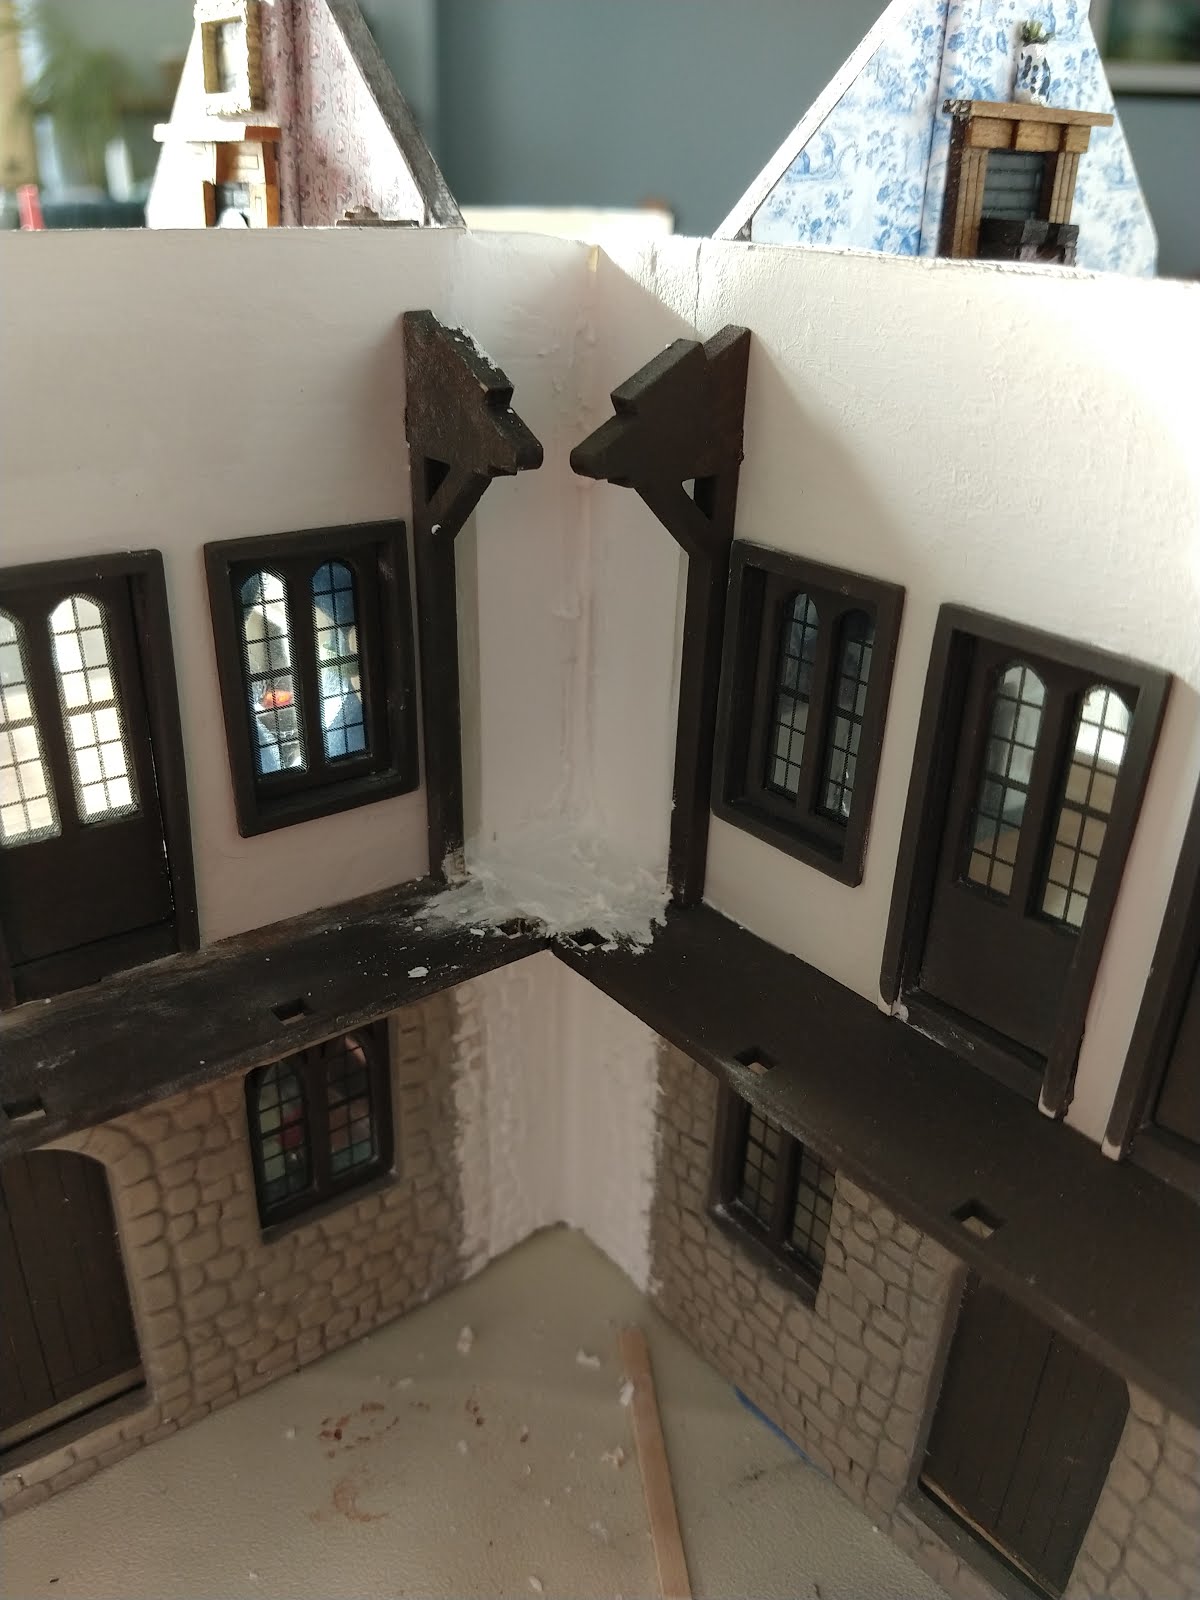
The one thing I did not do that I should have is draw a substantial line up the center groove of the roof. I ended up going off kilter as I went along laying tiles, so a bit of "surgery" was needed.


This was decidedly the most complicated part of the build and I am relieved that it's done. You can see it in the pics below with the Coaching Inn Arch beside it, which I also did the exterior finishing for. And the gallery closeup shows a rose plant from MiniFromItaly on Etsy.


I have much more to share because I also had more interiors to complete. The joining created some large spaces that I've used as storage spaces, and I'm hoping to share those tomorrow in another post. 


Comments

Popular posts from this blog

Where I bought all of the things

Updated 8/28/2021 with new shops I've noticed: I have been afraid to start on this post because it means going back through SO MANY posts and Pinterest pins and who knows what else, but I also know it's something I can do because I can recall how difficult it was to find items when I was looking to source everything I needed for this project. So this is as complete a list as I can make it, which means it's probably not complete at all...there are certainly shops missing where I just forgot where I got things or purchased one item from an Etsy or eBay store. I hope it will still be helpful to folks, though! Shops are generally listed under the category where I got the most items from but if I got a lot from several categories they are cross-listed. I've also included some web sites that have been on my radar or used for other projects even if I didn't use them for this one. They're  noted as such. These are all 1:48 scale or O Scale unless otherwise noted. Please...

Setbacks and progress

I haven't posted in a while because I haven't really completed anything lately. I am still working away on both Butterwick Houses, but I thought I would at least post some pictures of work in progress. One of the tricky things with these houses has been figuring out my plan to build them. The reason for this is that they will eventually be joined in some fashion -- their balconies will connect to form the gallery. The bottom part of them needs to be in a stone finish, and I couldn't put the lower windows in until the stone finish was done around them. But the stone finish couldn't be completed until the upstairs was more complete and I attached the balconies. Add to this a whole lot of wallpaper and details which means I really need to work on the rooms from the bottom up without the upper floor in place for each room, and it became a real conundrum. Ultimately what I decided to do was to do part of the front stone, particularly around the windows. I'll then ha...

Real flagstone floors for quarter scale

One of the things I've been doing for all of the buildings in the project is using real stones for flagstone floors, which I think really gives it a more authentic feel. I get them from Stacey's Miniature Masonry , and I thought I'd post a tutorial here on how they're done. The stones and mortar (which Stacey's also sells) come with instructions, but I think it'll be handy to see photos of the process. I like to lay down a coat of paint before starting, to give the stones something better to stick to, although there won't be any gaps once it's done. Then the first step of laying the floor is to glue all of the stones down with PVA adhesive (tacky glue). The recommended way to do it is to plan them all out in advance, but I don't have patience for that so I usually just wing it! That's probably how they did them back then anyway, right? At some point you'll probably need to cut a stone or two in half to get ones that fit your last remainin...