I'm making more progress -- slowly -- and am thisclose to having the front ready to glue on to the first Butterwick House. But the last few panels needed some adjustment, so more on that in a future post.
Instead I thought I'd give a first look at the coffee room, as I'm making pretty good progress on it.

I got the Petworth Miniatures gaming table "dressed," finally, including a sandwich from Medieval Miniatures and a whiskey set from Stewart Dollhouse. The sandwich was invented when the Earl of Sandwich was hungry but didn't want to leave the gaming table and asked that meat between two pieces of bread be brought to him, so it was fun to slip that little anecdote into my scene.

The secretary is from Victoria Miniland and it's stocked with books from kenna_gal on eBay.

There are more of them in the bookshelves on either side of the fireplace (another from Herdwick Landscapes). Would a coaching inn have had that many books? Possibly not, but it's also possible that it runs a little circulating library if there is not another in this village.
This room would have been the domain of men, and you can see it's decidedly masculine with the darker green panelling. I was debating whether to use the panelling or just have the wallpaper, but I felt like it would give some balance to the dining room panelling in the other building. And since everywhere else I'm using white panelling, it was a chance to have it look a little different. I'm quite happy with how it's coming out.

I keep trying different furniture configurations, trying to decide where I want everything. Once I tuck the chairs under the round table (it will have a little bite to eat and the coffee that gives the room its name) I think it will all fit pretty well.
Instead I thought I'd give a first look at the coffee room, as I'm making pretty good progress on it.

I got the Petworth Miniatures gaming table "dressed," finally, including a sandwich from Medieval Miniatures and a whiskey set from Stewart Dollhouse. The sandwich was invented when the Earl of Sandwich was hungry but didn't want to leave the gaming table and asked that meat between two pieces of bread be brought to him, so it was fun to slip that little anecdote into my scene.
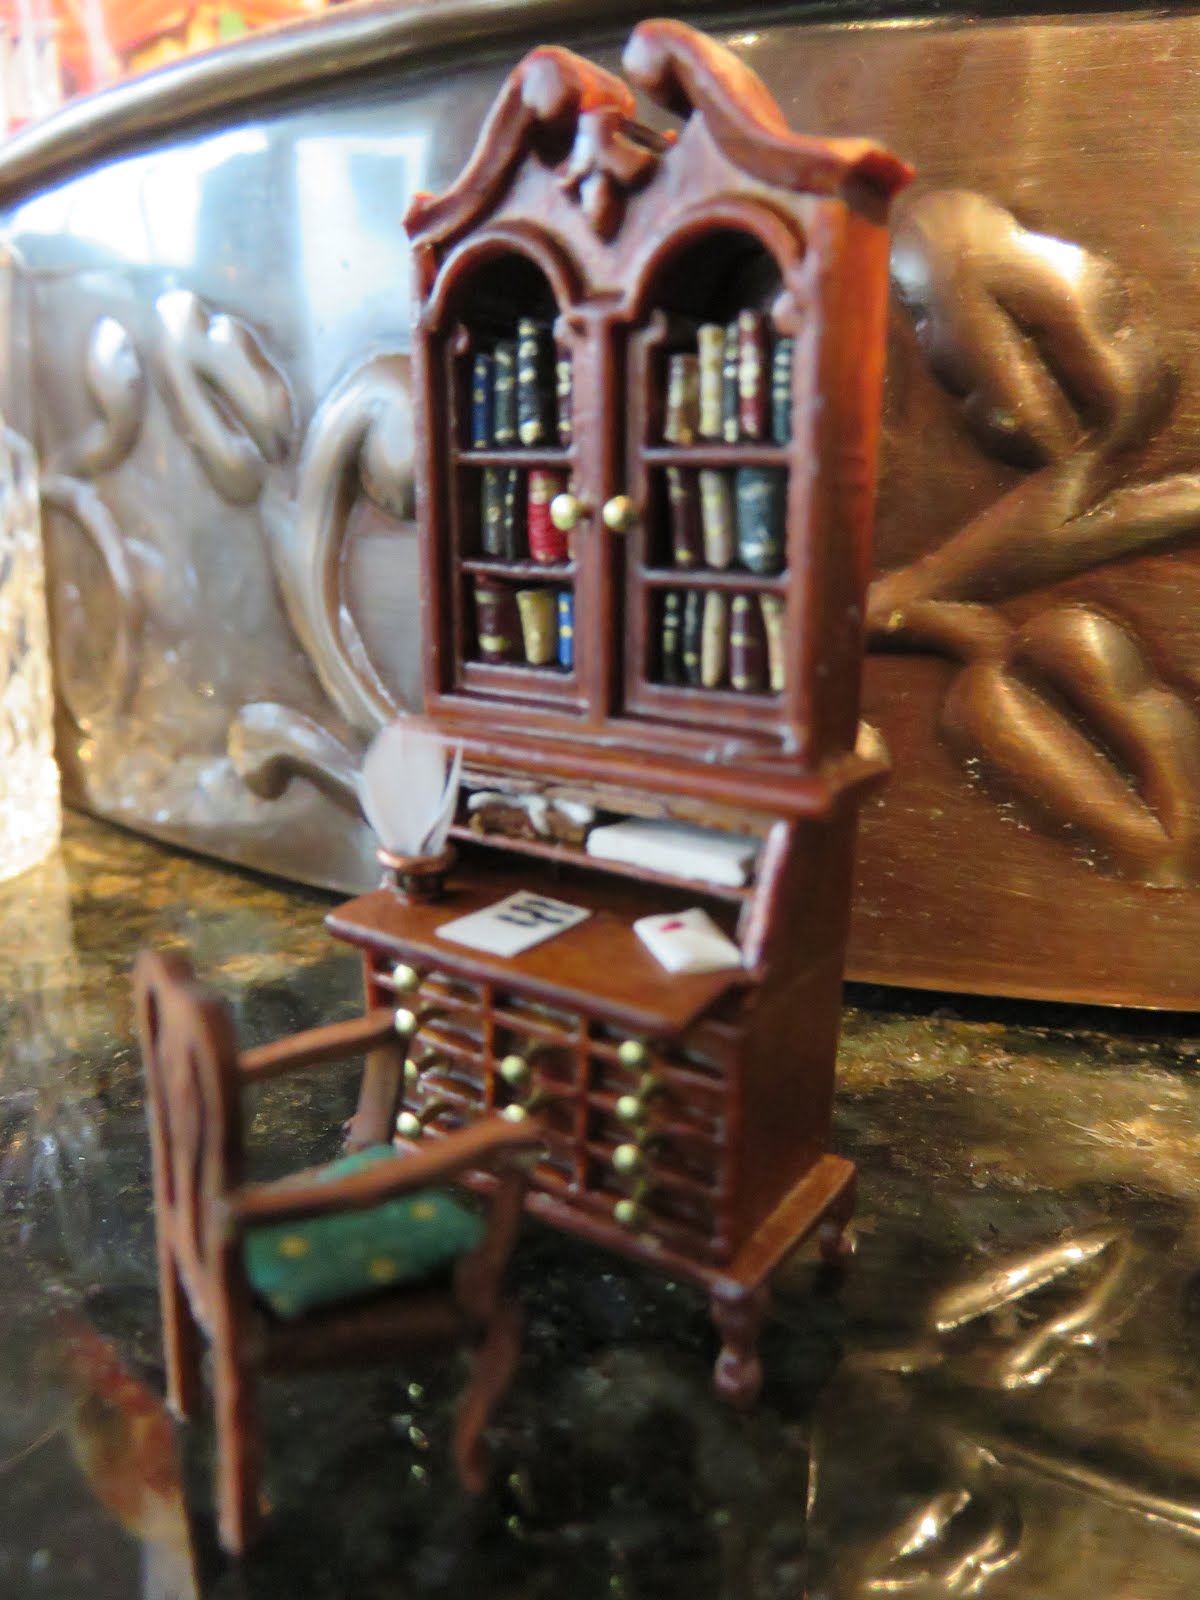
The secretary is from Victoria Miniland and it's stocked with books from kenna_gal on eBay.

There are more of them in the bookshelves on either side of the fireplace (another from Herdwick Landscapes). Would a coaching inn have had that many books? Possibly not, but it's also possible that it runs a little circulating library if there is not another in this village.
This room would have been the domain of men, and you can see it's decidedly masculine with the darker green panelling. I was debating whether to use the panelling or just have the wallpaper, but I felt like it would give some balance to the dining room panelling in the other building. And since everywhere else I'm using white panelling, it was a chance to have it look a little different. I'm quite happy with how it's coming out.
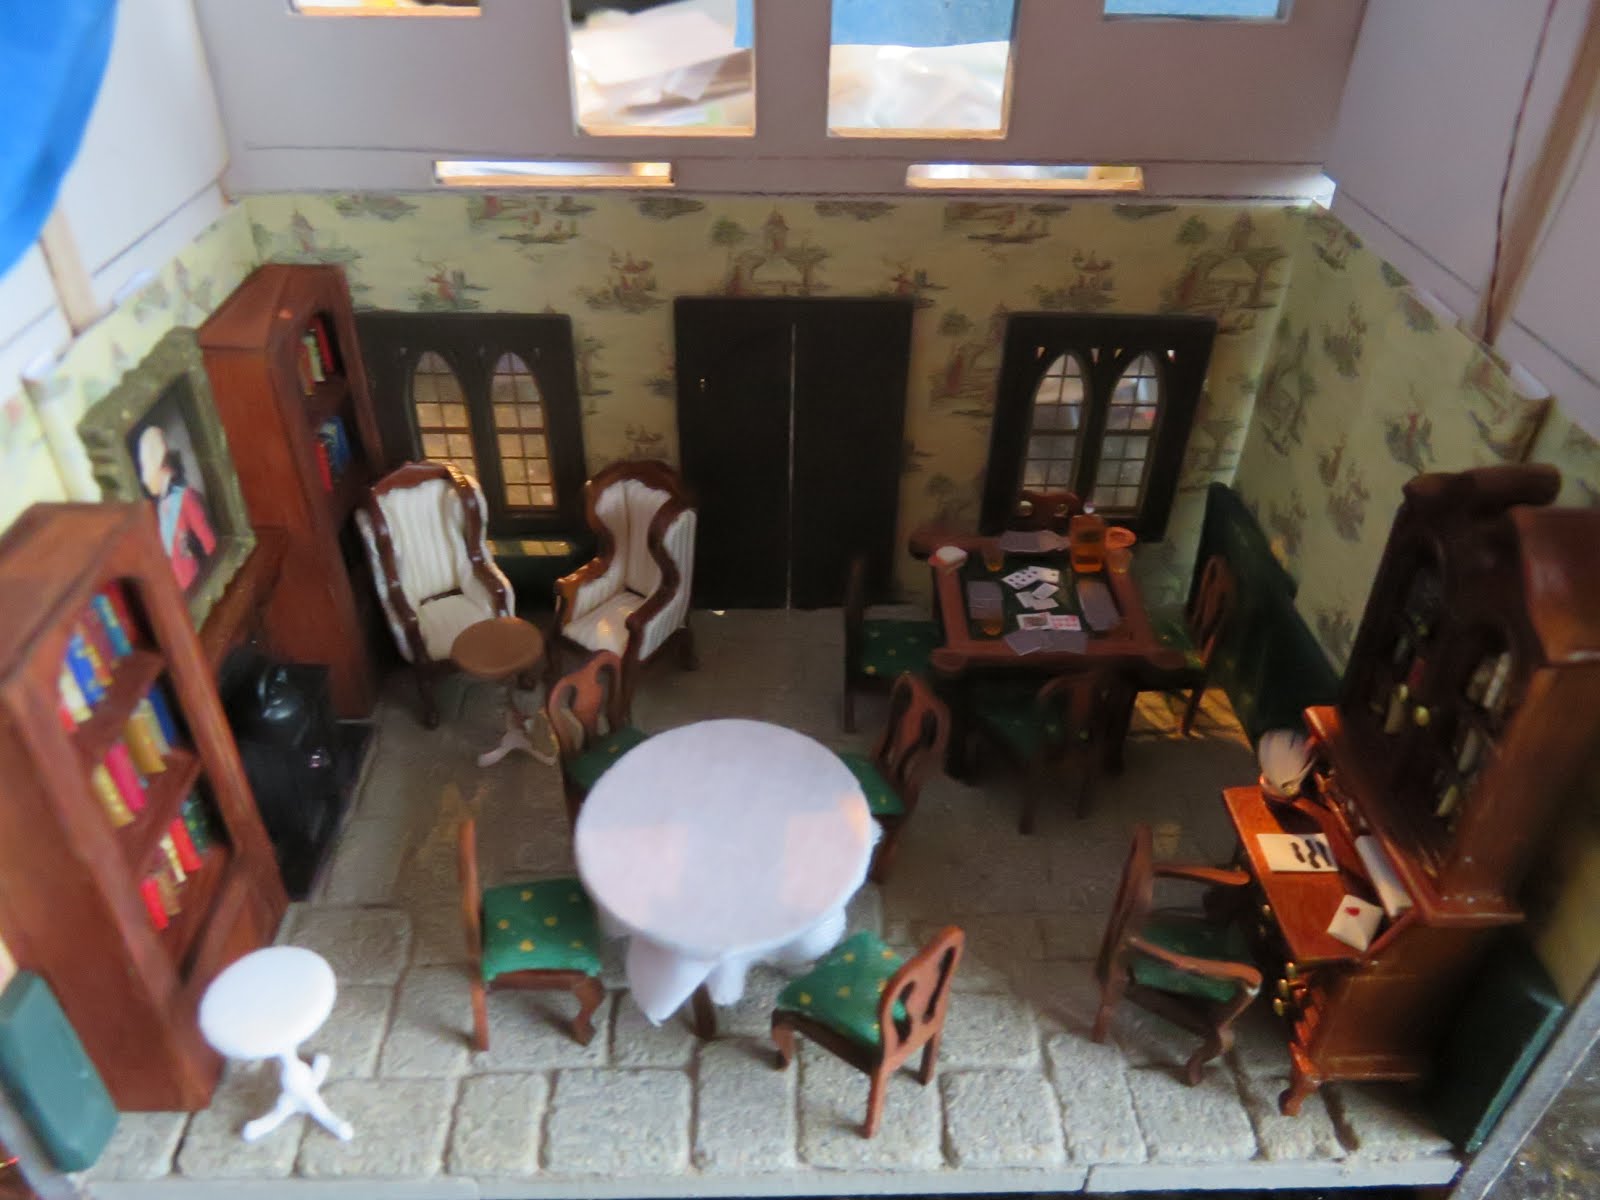
I keep trying different furniture configurations, trying to decide where I want everything. Once I tuck the chairs under the round table (it will have a little bite to eat and the coffee that gives the room its name) I think it will all fit pretty well.
Comments
Post a Comment