The next-farthest-along in my project is the Tanglewood Hall kit from Petite Properties. Rather than using it as a house, it will be part of the inn frontage. In my mind, the inn started smaller, and then took over the space next door.

Coaching inns tend to have two types of frontage on a high street: either the inn's rooms run along the high street, or there is passageway back to the inn yard, where the majority of the rooms are. This allows the space around the passageway to be utilised for shops.
I decided to make my inn a bit of a hybrid. So there will be a shop and a dressmaker/milliner's office on one side of the building, with a loft above them that's additional sleeping space for the inn. As part of growing and taking over some of this space, the inn added a second, main kitchen (more on the first one much later), and a bedroom upstairs.
The kitchen needs to work double-duty, as I learned that lower-class passengers on the stagecoaches would have eaten in the kitchen. So in addition to the pots and pans and food being cooked (again largely from Medieval Miniatures) there will also be a kitchen table that will eventually be dressed with a meal. I love tiny food and one of the fun challenges of this project has been gathering and assembling lots of different little meals for the different dining areas.

Herdwick Landscapes have fantastic Georgian style kitchen ranges, so that's what's gone into the Petite Properties surround. I'm attempting to make a little griddle to go beside it, and then there'll be a shelf with some utensils and other kitchen miscellany, and another shelf for the pots and pans up top.
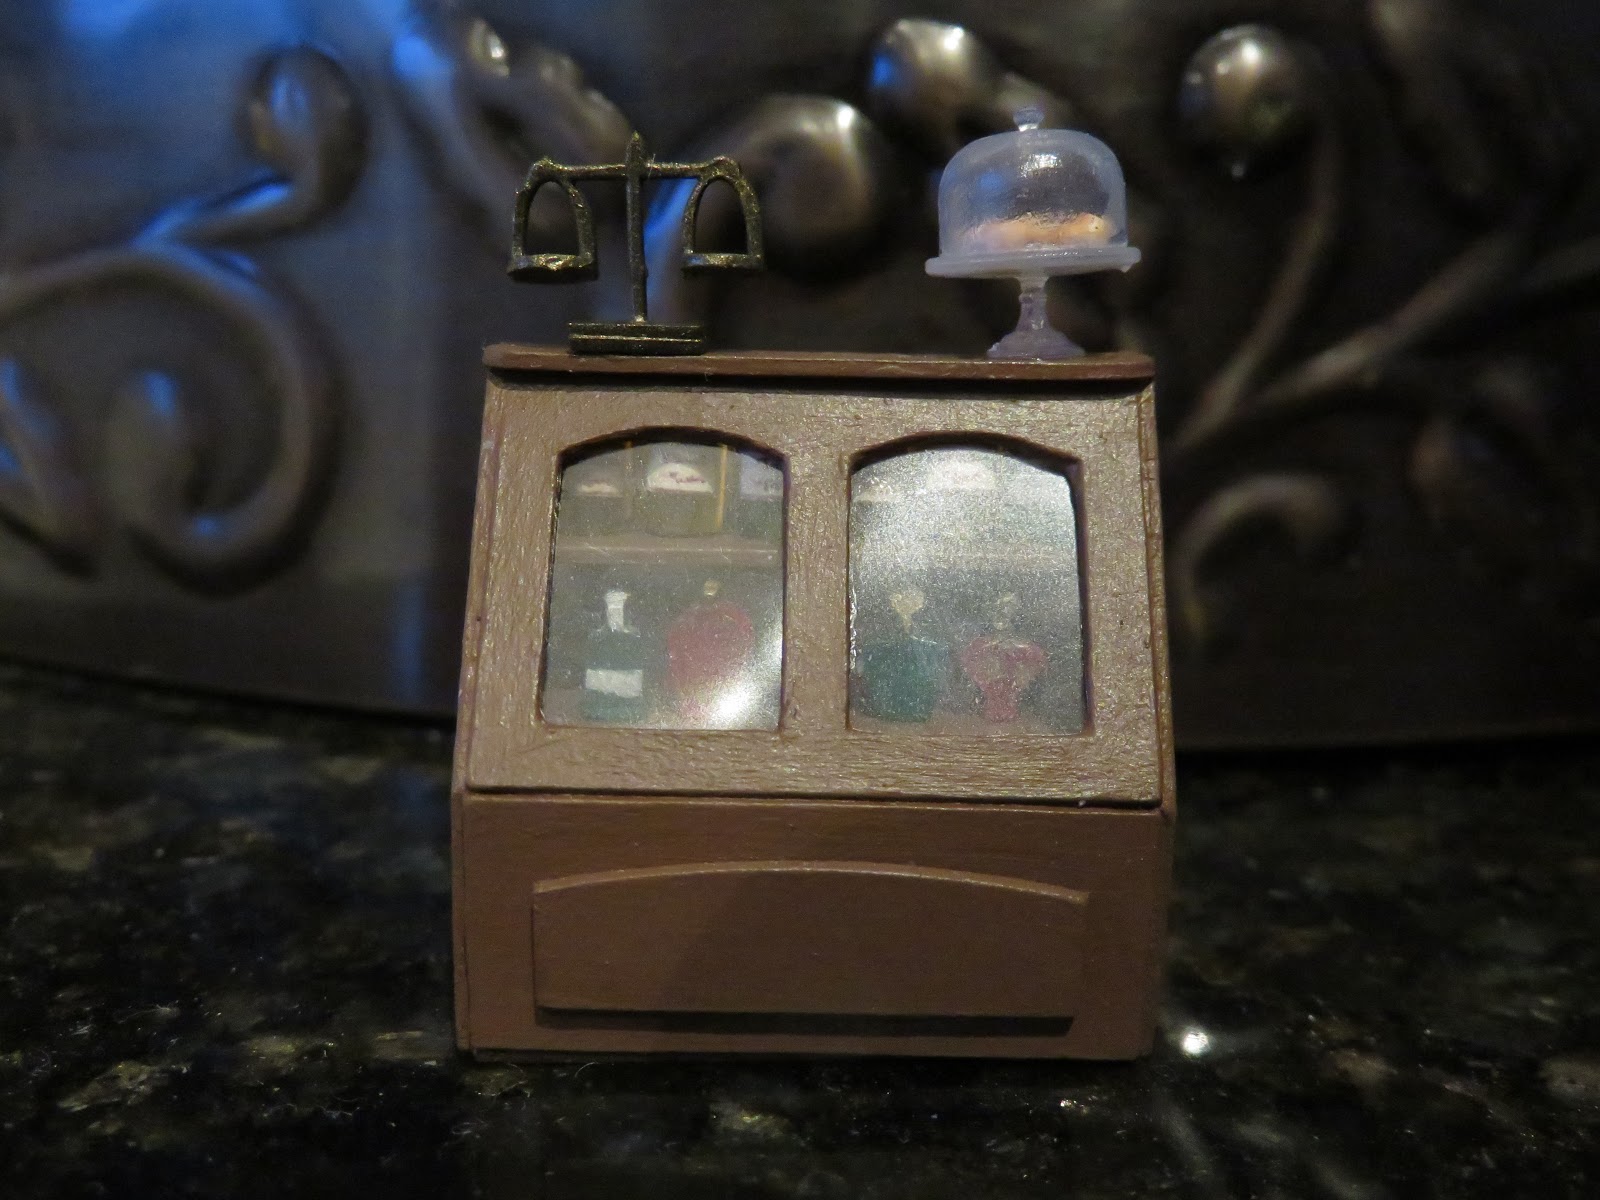
As for the shop, most of the work is done, with loads of accessories already glued in, mostly from Stewart Dollhouse, Mini From Italy, and Cynthia Howe Miniatures. The open window on the ground floor will be a shop window; you can see some pictures of it in the detail pics at the end of the post. I'm waiting until I do more of the finishing work on the exteriors to install the shop window.

One of the challenges of doing this one is figuring out the order to do things. I need to ensure that the wires for the upstairs lights pass down through the shop wall, while the upstairs fireplace needs to pass down behind the range. So I think I'm going to need to glue ALL of the upstairs together and then somehow pass the wires through, glue the stove, and finish gluing the upper floors. Oh, and get the floors in at some point, and wallpaper the bedroom (eek!).

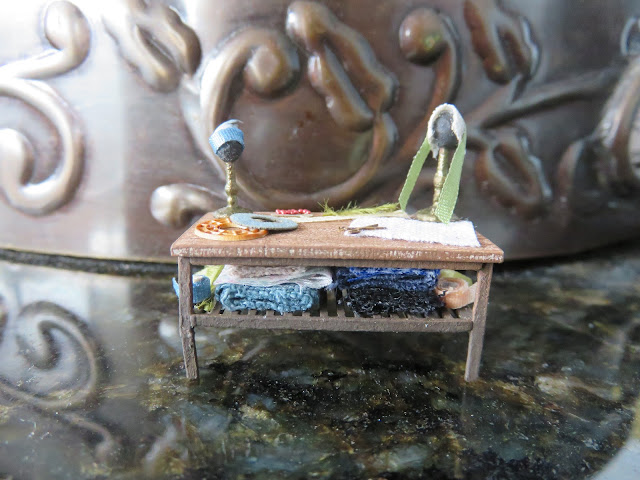
Most of the shop and dressmaker/milliner's furniture is Petite Properties, as is the kitchen table, chairs, and butcher block stand. The dressmaker/milliner's table was originally supposed to be the kitchen table, but it was a bit too large for that space. I repainted it and I'm really happy with how it turned out for this purpose. These (simpler) Regency hats I made myself, but there's also bits of a Stewart Dollhouse hatmaking kit strewn about the table.


Next up (I think) will be gluing the loft bottom to the first floor, gluing some of the lighting wires in place and finishing the kitchen shelves and griddle, as it'll be much tougher to work in the kitchen once the upper floors are glued.

Coaching inns tend to have two types of frontage on a high street: either the inn's rooms run along the high street, or there is passageway back to the inn yard, where the majority of the rooms are. This allows the space around the passageway to be utilised for shops.
I decided to make my inn a bit of a hybrid. So there will be a shop and a dressmaker/milliner's office on one side of the building, with a loft above them that's additional sleeping space for the inn. As part of growing and taking over some of this space, the inn added a second, main kitchen (more on the first one much later), and a bedroom upstairs.
The kitchen needs to work double-duty, as I learned that lower-class passengers on the stagecoaches would have eaten in the kitchen. So in addition to the pots and pans and food being cooked (again largely from Medieval Miniatures) there will also be a kitchen table that will eventually be dressed with a meal. I love tiny food and one of the fun challenges of this project has been gathering and assembling lots of different little meals for the different dining areas.

Herdwick Landscapes have fantastic Georgian style kitchen ranges, so that's what's gone into the Petite Properties surround. I'm attempting to make a little griddle to go beside it, and then there'll be a shelf with some utensils and other kitchen miscellany, and another shelf for the pots and pans up top.
As for the shop, most of the work is done, with loads of accessories already glued in, mostly from Stewart Dollhouse, Mini From Italy, and Cynthia Howe Miniatures. The open window on the ground floor will be a shop window; you can see some pictures of it in the detail pics at the end of the post. I'm waiting until I do more of the finishing work on the exteriors to install the shop window.

One of the challenges of doing this one is figuring out the order to do things. I need to ensure that the wires for the upstairs lights pass down through the shop wall, while the upstairs fireplace needs to pass down behind the range. So I think I'm going to need to glue ALL of the upstairs together and then somehow pass the wires through, glue the stove, and finish gluing the upper floors. Oh, and get the floors in at some point, and wallpaper the bedroom (eek!).

Most of the shop and dressmaker/milliner's furniture is Petite Properties, as is the kitchen table, chairs, and butcher block stand. The dressmaker/milliner's table was originally supposed to be the kitchen table, but it was a bit too large for that space. I repainted it and I'm really happy with how it turned out for this purpose. These (simpler) Regency hats I made myself, but there's also bits of a Stewart Dollhouse hatmaking kit strewn about the table.


Next up (I think) will be gluing the loft bottom to the first floor, gluing some of the lighting wires in place and finishing the kitchen shelves and griddle, as it'll be much tougher to work in the kitchen once the upper floors are glued.
Comments
Post a Comment